
|
5/1/2020 0 Comments May 01st, 2020***This project requires basic handsewing skills.*** Since the weather is warming up for spring, many of us are spending more time outdoors. I love to be outside, and I find that I get lots of great ideas for creative ideas when I am out of doors. However, I think that taking supplies to write down my ideas or work on creative projects is exhausting. Pens blow away in the wind, paper flies off your lap, etc. That's why I dreamed up this fun project - it's a pen/pencil holder that wraps around a clipboard and keeps your writing utensil in place. Are you ready to make your own? Let's get started! There are a lot of steps, but once you get started, it is a decently easy project. :) What You Will Need: - A strip of felt that is 28.75 inches long and 2 inches wide - Strong Glue (I used Tacky Glue) - Needle & Thread - Elastic (any width) - Measuring tape or yardstick 1. Cut our your strip of felt, if you haven't already. 2. Measure from the bottom of the strip to 4 inches up, and use a pencil to mark that spot. 3. Fold over the bottom of the felt until it reaches the four-inches line you had marked. 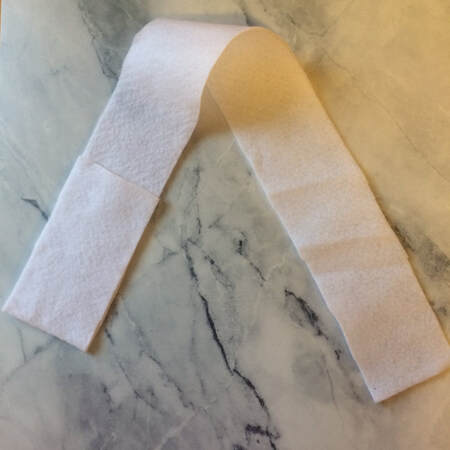 4. Place a line of glue along the edges of the bottom and both sides of your folded-over section. 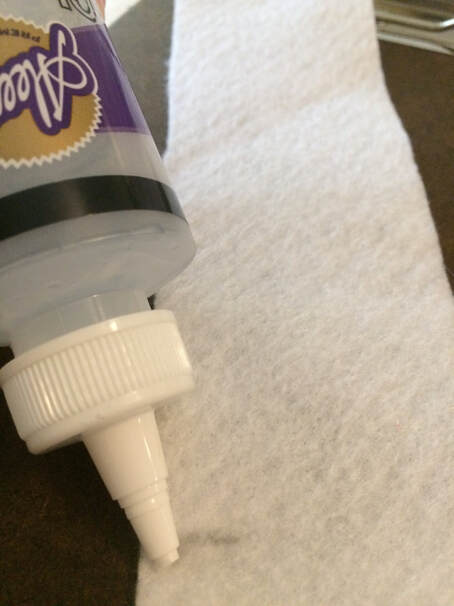 5. Let dry (this may take several hours). 6. Now, take your piece of elastic, and begin to hand-sew it onto the bottom of your felt strip. The felt may wiggle around for a while at first, and that's perfectly ok. You may try stitching in a bit of a "square" pattern, so that all of stitches form a square-like shape on the elastic. 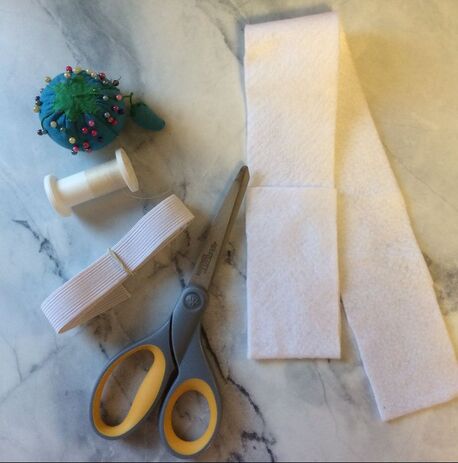 7. Sew the elastic onto the other end of the felt. Before you begin stitching, slip your partially-finished holder over a clipboard. Examine how well it will fit on the clipboard, and evaluate how tight the elastic will need to be. Since clipboards can vary a bit in size, I didn't provide measurements for the elastic. 8. Put in some pens and take your new creation outside! 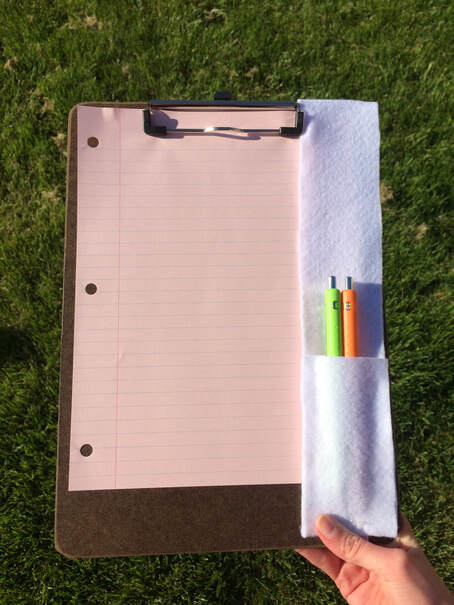 Thank you so much for following along with me!
Love, A
0 Comments
Leave a Reply. |
Search by typing & pressing enter
