
|
1/3/2020 2 Comments 3 easy bookmarks to make!We have had so much fun crafting these unique, stylish bookmarks! The best part is that all of them can be made in 15 minutes or less! Which one are you starting with? :) 1. Quilted Bookmark Supplies you need: * Card stock paper (all colors) * Scissors * Double-sided tape * Laminating paper 1. Cut a strip of paper about 6” long and 2 1/2” wide. 2. Cut a variety of sized paper triangles. Make them out of many colors and patterns. 3. Lay out a design on your paper strip using your triangles. Be creative!! Try making different patterns and choose the one you like the most. 4. Tape the triangles down with double-sided tape. 5. Optional: cut your name out of paper and tape it down. We used Nicki as an example name. 6. Finally, laminate your project and show it off!! Love, B 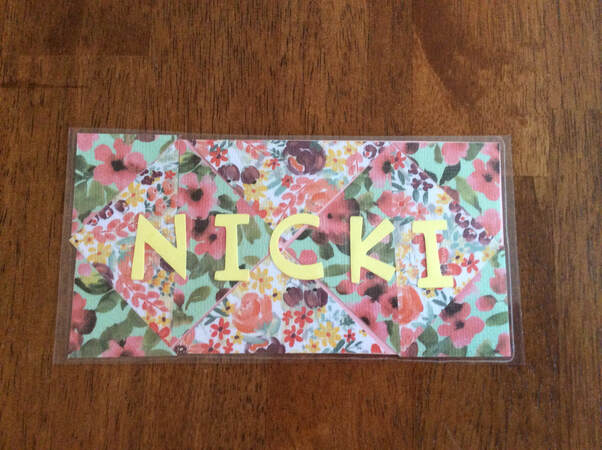 The finished bookmark! 2. Frog origami bookmark: Supplies you need: * Green origami paper * Tape * Red string * Eye stickers 1. Put your paper green side down. 2. Fold in half lengthwise. 3. Unfold and fold in half the other way. 4. Unfold. 5. Fold all corners to the center. 6. Unfold two corners that are beside each other. 7. Cut a 2” long piece of string. 8. Tape the string to the green paper on the plain side. Be sure to leave 1” of the string hanging down between the two unfolded corners. 9. Refold the corner. Leave the string hanging. 10. Turn the paper so the string is facing away from you. 11. Fold the paper in half by folding the top down. The string should now be facing you. 12. Add eye stickers and this little frog is ready to devour any book page you feed him! Love, B 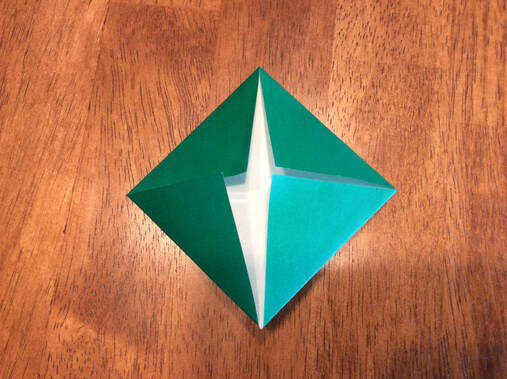 Step 5: Folding all corners to the center 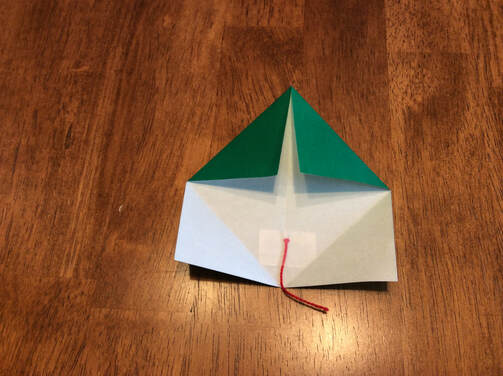 Step 8: attatching the string mouth 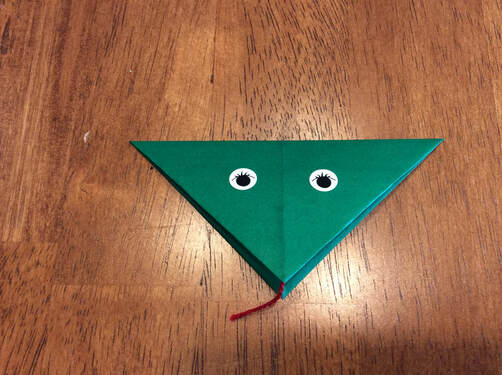 The finished product! 3. Geometric Painted Bookmark Supplies you need: * Thick, white paper or cardstock * Acrylic paints * Painters or masking tape (really, any paint that will remove from paper) * Paintbrushes (one for each color of paint) * Ribbon or yarn (optional) 1. Cut your paper into a strip 6 inches long by 1 3/4 inches wide 2. Cut or tear off pieces of tape off the roll in varying lengths 3. Begin laying the tape across the bookmark in a varying, criss-crossing pattern. 4. Painting the bookmark, alternating colors in each taped-off section. 5. Make sure that every white space is filled 6. Wait until the bookmark is completely dry before slowly peeling up the tape. (You may notice that my bookmark is a bit ripped from using too thin of a paper. Make sure to use extra caution when peeling the tape so that you do not damage the bookmark like I did)! You should be left with different sizes and shapes of color, with white lines in between them. 7. (optional) use a hole punch to punch a hole in the top of the bookmark, and thread a ribbon or piece of yarn through to make a tassel. Love, A 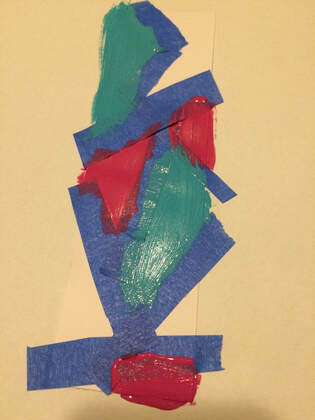 Step 5, with painting in process and tape still on the bookmark (it blends into the white background a bit). 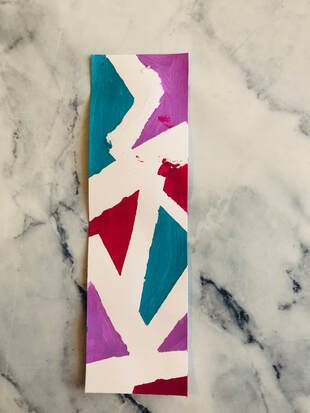 Step 6: The completed bookmark! I chose to skip the tassel on mine.
2 Comments
Annabelle
2/13/2020 05:01:38 pm
I love this website!! Are these pictures all examples that you have made? Leave a Reply. |
Search by typing & pressing enter
